Directions
Make a travel guide with a brief overview of two cities or countries that you would like to visit.
- Create a new file in your assignments folder called travel.html.
- Write the basic HTML structure, using the title Travel Guide.
- Find a background texture to use for the “picture frame” of your travel guide. Try visiting:
- In the body, create a single-cell layout table the same width as the browser.
- Set the background image of the table to the image you downloaded.
- Set the border width to 2 pixels and choose a border color.
- Set the cell spacing and cell padding to 0 pixels.
- Set the horizontal alignment of the cell to center.
- In the top of the only cell in the layout table, add a level 1 heading with the text Travel Guide.
- Below the heading, add a nested table for the inside of the “picture frame”.
- Set the width to 80% of the available space.
- Set the background color to white.
- Set the border width and color the same as the layout table.
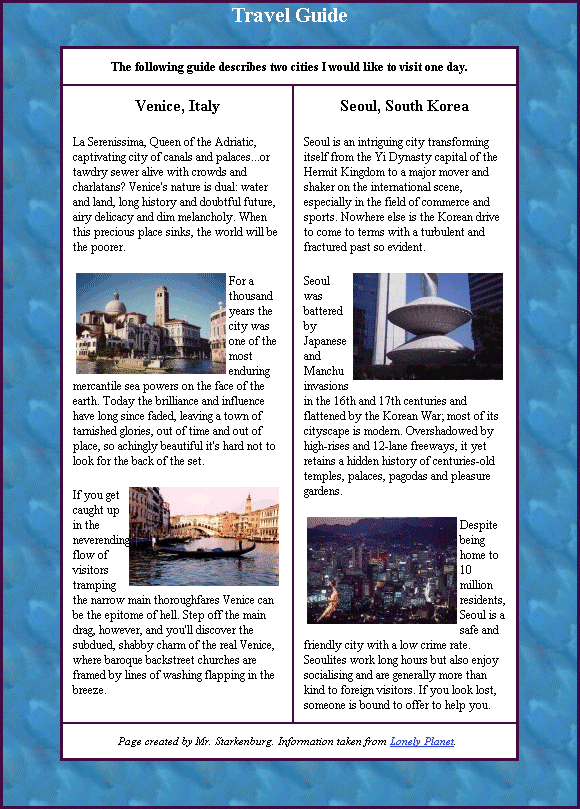
- Create the table structure shown in the example.
- Add the introduction text above the two columns.
- In each of the two column cells:
- Center a level-2 heading with the name of the city or country.
- Use travel.yahoo.com or lonelyplanet.com to find information about your travel destinations.
- Add about three paragraphs of text to describe the location.
- Find and save two pictures. Using a photo editor, reduce the size of each image to 150 pixels wide.
- Add the pictures to the text in appropriate locations, using the align property to let the text wrap around them.
- Add the source text below the two columns in a reduced (-1) size font. Include a link to the source web site.
- Below the inner nested table, add three line breaks to expand the layout table for the bottom border.
- Raise your hand and ask your teacher to grade your assignment on screen.
Example

